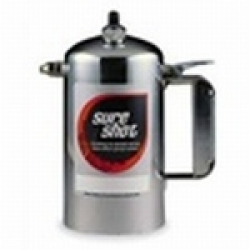
Sureshot Sprayer Troubleshooting Model A Sprayer
 Click to enlarge |
|
SURE SHOT SPRAYER in AUSTRALIA
Trouble Shooting Model "A" Sprayers
CLEANING THE #110 VALVE
1) ALWAYS DEPRESSURIZE SPRAYER BEFORE REMOVING ANY PARTS.
2) Remove filler cap assembly.
3) Remove nozzle and adapter and clean.
4) The face of the #110 valve is now visible. The face should be clean and clear of all
particles. You should see a circular depression caused by the back of the adapter. This
depression should be clean and clear of all debris also.
5) Replace adapter and washer. Tighten.
6) Depress #117 trigger several times to reset seal between face of #110 valve and the back of adapter.
7) Replace cleaned nozzle and washer. Tighten.
8) Replace filler cap assembly. Tighten.
9) Pressurize sprayer.
10) If leak persists, replace #110 valve.
CLEANING THE NOZZLE
1) ALWAYS DEPRESSURIZE SPRAYER BEFORE REMOVING ANY PARTS.
2) Remove nozzle from operating position leaving adapter in place.
3) Using needle nose pliers, remove spiral from nozzle.
4) Rinse both nozzle and spiral with cleaner.
5) Make sure the nozzle orifice hole and the spiral grooves are clean and clear of all dirt
before putting back together.
6) Put spiral back into nozzle and reassemble including washer. Tighten.
7) If nozzle still does not spray correctly it may need to be replaced.
PROBLEM: SPRAYER WILL NOT SPRAY AT ALL
Reason/Solution
A) Sprayer is completely full of liquid: Only fill sprayer 2/3 full (32 ounces).
B) No air pressure: Pressurize.
C) Nozzle completely clogged: Clean or replace nozzle. (See Cleaning the Nozzle above)
PROBLEM: PIN STREAM ONLY
Reason/Solution
A) Liquid too thick: Thin until sprayable. Consult your liquid supplier for correct thinning
procedures.
B) Too little air pressure: Must have a minimum of 80 psi.
C) Pin stream nozzle is in the operating position: Replace with spray nozzle.
D) The spiral is missing from spray nozzle: Replace the spiral.
PROBLEM: LEAKS FROM #115 STUFFING BOX NUT
Reason/Solution
A) #115 stuffing box nut loose: Tighten #115 1/16th of a turn and apply a drop or two of
lubricant to the #110 valve stem at the rear of the #115.Tilt the sprayer so that the
lubricant runs into and around the #115. Depress trigger to work in oil.
(B) Worn 114: Replace.
PROBLEM: STUCK OR DRAGGING TRIGGER ACTION
Reason/Solution
A) #115 stuffing box nut is too tight:
Loosen #115 nut 1/16th of a turn and apply a drop or two of lubricant to the #110 valve
stem at the rear of the #115. Tilt the sprayer so that the lubricant runs into and around the
#115. Depress trigger to work in oil. Retighten for proper action.
PROBLEM: FILLER CAP WON'T ACCEPT AIR
Reason/Solution
A) Dirty or damaged filler cap: Replace.
B) #121 valve core is swollen: Replace.
PROBLEM: LEAKS FROM TOP OF FILLER CAP
Reason/Solution
A) Filler cap has been damaged: Replace.
B) #121 is loose: Tighten.
C) #121 is worn: Replace.
PROBLEM: LEAKS FROM BOTTOM OF FILLER CAP
Reason/Solution
A) #120 gasket is missing or dirty: Replace.
PROBLEM: LEAKS FROM NOZZLE
Reason/Solution
A) Dirty or worn face on #110 valve: See Cleaning the #110 valve
(B) #115 stuffing box nut is too tight: See stuck or dragging trigger action above.
REPAIR PROCEDURES
The following is the correct order and way to remove and replace all the parts on your Model "A" Sprayer.
a) ALWAYS DEPRESSURIZE SPRAYER BEFORE REMOVING ANY PARTS.
b) Remove 15/16" hex filler cap.
c) Take a pliers and remove the #116 cotter pin from the #117 trigger.
d) Remove the #117 trigger
e) Remove 1/2" hex nozzle from the #307 adapter, or if your sprayer has no adapter, remove
9/16" hex nozzle from the front of the sprayer.
9/16" hex nozzle from the front of the sprayer.
f) If your sprayer has a #307 adapter, remove the 9/16" hex #307 adaptor from the fringe of
the sprayer.
the sprayer.
g) Remove the 3/8" hex #115 stuffing box nut.
h) Remove the #110 valve. Note that the #111 spring is assembled to the #110 valve.
i) You will destroy the #114 by removing it. Be careful not to damage the inside threads
when removing the #114. #114 stuffing box packing may be removed by taking a small
thin straight edge screwdriver and working the #114 stuffing box packing loose.
when removing the #114. #114 stuffing box packing may be removed by taking a small
thin straight edge screwdriver and working the #114 stuffing box packing loose.
j) All the removable parts are now off your Model 'A" Sprayer.
k) To reassemble start by taking a #114 and placing it into the position you just removed it from. Take
#115 and just hand start thread.
#115 and just hand start thread.
l) Take #111 valve spring and assemble it to #110 valve, place whole assembly into sprayer.
m) Take a #108 washer and assemble to adapter. Take assembly and push face of #110 back into
sprayer until you can hand start thread. Tighten 9/16" hex adapter until washer is seated.
sprayer until you can hand start thread. Tighten 9/16" hex adapter until washer is seated.
n) Snug 3/8" hex #115 stuffing box nut. Do not over-tighten.
o) Replace #117 trigger. Line up holes in trigger with hole in back of #110 valve. Insert #116 cotter
pin, bend with pliers.
pin, bend with pliers.
p) Press down on #117 trigger and apply a drop or two of lubricant to the valve stem of the #110 at
the rear of the #115 stuffing box nut. Tilt the sprayer so that the lubricant runs into and around the
#115.
the rear of the #115 stuffing box nut. Tilt the sprayer so that the lubricant runs into and around the
#115.
q) Take 1/2" hex nozzle and #309 washer and assemble to 9/16" hex adapter. Tighten.
r) Replace 15/16" hex filler cap. Tighten.
s) Pressurize sprayer.
t) Check for leaks.
Viton® is a registered trademark of DuPont Dow Elastomers
SURE SHOT SPRAYERS
RUSTBUSTERS AUSTRALIA PTY. LTD.
P. O. Box 1324, Beeneigh, 4207, Queensland, Australia
Email: info@sureshotsprayer.com.au
Write Review
Your Name:
Your Review: Note: HTML is not translated!
Rating: Bad Good
Enter the code in the box below:

Your Review: Note: HTML is not translated!
Rating: Bad Good
Enter the code in the box below:
There are no additional images for this product.
 Categories
 Shopping Cart


